The Loops & Logic markup language is designed to make working with dynamic content in WordPress easy by extending familiar HTML tags and syntax. To make L&L as powerful as it is, we had to build on HTML syntax to create new conventions that allow you to work with dynamic content and conditional logic. In this guide, we’ll introduce you to the lingo and anatomy of L&L markup. If you haven’t done so already, we recommend starting your L&L journey by reading through our absolute beginner’s guide to get a conceptual understanding of how the language works and then reading through this post to learn how to put it into practice.
Terminology
Below are a few of the common terms you’ll see when working with L&L or reading through its documentation. If you don’t understand all the terms on your first read-through of this guide, that’s okay! This post is designed to give you an overview to get you started, but you’ll become more familiar with the terms as you read the documentation and write your own markup.
Template
In the same way that a WooCommerce shop uses the ‘product’ post type and a WordPress blog uses the ‘post’ post type, Loops & Logic uses a custom post type called template. L&L markup is always written within a template, whether that’s in the WP admin under Tangible > Templates or directly in a page builder using the Tangible Template block.

Block
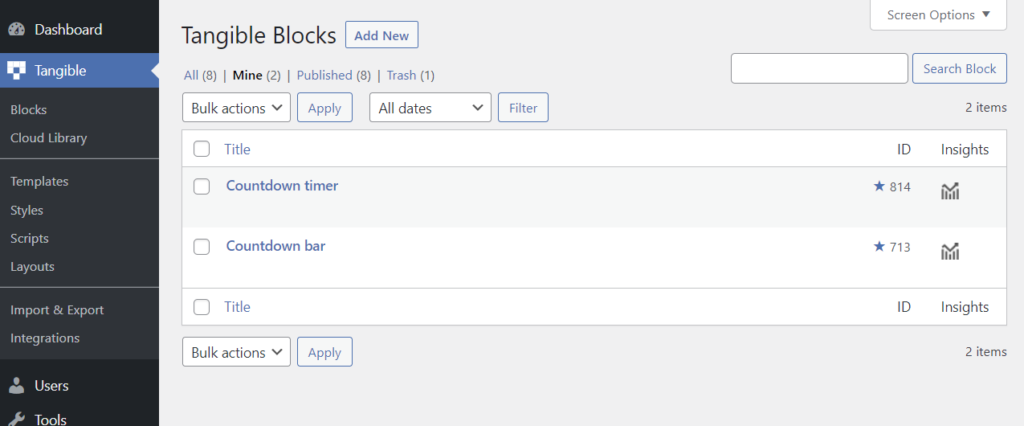
Nearly identical to templates in the Loops & Logic plugin, our Tangible Blocks plugin uses a custom post type called block. L&L markup can be added to a block in the exact same way as it’s added to a template, but blocks have an additional tab called Controls that allows you to build page builder controls for the block, allowing you to create user-friendly blocks using simple L&L markup. You can learn more about Tangible Blocks here.
Query
The term query isn’t unique to Loops & Logic, but it’s often used to express what happens when you run L&L markup. A query is a process of requesting or manipulating data in a database, in our case the WordPress database that contains all the data associated with the site. When you write L&L markup that performs an action such as searching, filtering, or sorting through a particular type of content, that code is querying the database whenever it’s loaded on a page. The most common query in L&L is the <Loop> query.
Tag and dynamic tag
Anyone familiar with HTML will know that a tag is a piece of markup language that indicates the beginning and end of an HTML element. Tags are distinct from normal text and are formed with angle brackets around the tag name, like <this>. Since L&L is an extension of HTML, it adds its own tags to the standard ones available in HTML. To differentiate the tags in HTML from those added by Loops & Logic, we use the term static tag to refer to standard HTML tags like <div> and <img> and dynamic tag to refer to those added by L&L, like <Loop> and <Field>.
If you’re an Elementor Pro user, you may be familiar with Elementor’s concept of Dynamic Tags, which allows certain dynamic content to be added to certain content fields. It’s important to realize that Elementor’s use of that term is unrelated to dynamic tags in L&L. We use the term tag to illustrate the similarity with HTML tags and we use the term dynamic to show that those tags actively interact with your site’s data dynamically. As a bonus, unlike Elementor, our dynamic tags like <Field> allow you to display content from a much wider variety of sources!
Field
In WordPress, a field is a specific piece of data associated with a post, whether that’s a default field like title, author, or published date or a custom field added by a third-party plugin. Loops & Logic allows you to query and display fields from lots of common post types using the <Field /> tag.
Attribute
Attributes in L&L work the same way they work in HTML; they modify something about the tag they’re placed in. An attribute is usually a pair of “key” and “value”. For example, in the dynamic tag <Field name="title" />, the key is name and the value is title which together form an attribute of the Field tag. The way to specify the value of an attribute can be a bit unique, which we’ll explain in the syntax section below.
Parameter
If you’re averse to learning new terms, you can think of the term parameter as a synonym of attribute. When you’re writing markup, the general syntax used for a parameter will look just like the syntax used for an attribute.
That being said, in the L&L documentation and in advanced WordPress development in general, you’ll find that when we refer to the attributes of a query (such as the attributes of the <Loop> tag), we call those query parameters because that’s a common term used to refer to the internal working of WordPress’s loop query. In contrast, other dynamic tags that don’t create queries (such as the <Field /> tag mentioned above) simply use the term attribute just like normal HTML syntax.
Condition
Sometimes referred to as conditional logic (from which Loop & Logic inherits half of its name), conditions in L&L allow you to show or skip content based on a set of rules. This is done with the <If> or <Switch> tag, usually by checking how a specific field of a post compares to an expected value.
Variable
Just like in algebra class, a variable is a placeholder that can hold a value. In L&L, variables can hold all kinds of data, from simple numbers or strings (like a user’s name) to things as complex as an entire query. Variables are created using the <Set> tag and are retrieved or referenced using the <Get /> tag.
L&L syntax
Enough with the dictionary definitions, let’s see it all in action! Below, we’ll take a look at some of the rules for writing L&L markup. Many tags will have their own unique format based on how the tag works, but the syntax below sets the ground rules that apply across the entire markup language.
Writing tags
An easy way to distinguish L&L’s dynamic tags from HTML’s static tags is that dynamic tags are always capitalized, like <User> and <Field>, unlike static HTML tags which are in lowercase. Just like HTML, L&L markup has different types of tags, some of which require writing opening and closing tags, and others which are self-closing. An example of an open tag is <Loop>, which can have attributes and can contain inner content. Inner content is written between the opening and closing tag. In the case of our <Loop> tag, this would be closed using </Loop>.
Self-closing tags are also sometimes simply called closed tags and they can have attributes, but not inner content. An example of a closed tag is <Field />. Closed tags always end with />. Take a look at the example below to visualize how this looks in practice.
  <Loop type=post>
    <Field title />
  </Loop>
The markup above starts with an opening <Loop> tag, which has a type attribute. After that, there’s a self-closing <Field /> tag which has an attribute called title. As you can see based on the indentation of the markup above, the second line, <Field title />, represents the entire inner content of the <Loop> tag, which then gets closed using </Loop>. Open tags like <Loop> can contain all sorts of things as their content: plain text, HTML markup, other dynamic tags (as is the case in this example), and even additional nested loops! The Loops & Logic documentation shows which tags are open and which are closed.
If you’re curious about what the L&L markup above is actually accomplishing, it’s creating a loop query of all the site’s post content (all the blog posts on a WordPress site). For every post it finds, it will display that post’s title, continuing to loop and display titles until it’s looped through all the posts in the database.
Writing the value of an attribute or parameter
If you’re in a rush, the shortest way to define the value of an attribute or parameter is without quotes, as is the case for the type and count query parameters below. Only values that exclusively contain alphanumerical characters, - dashes, or _ underscores can be defined without quotes.
<Loop type=post count=3></Loop>
For multiple values, use a comma without any spaces.
<Loop type=fruit category=apple,orange></Loop>
If you need to pass a value that contains a space or any special character, use quotes. Note that L&L is a bit pickier than HTML (at least at the moment) with regards to which special characters can be passed to an attribute without quotes. This means that in general, it’s wise to use quotes around any value that contains a special character, just to guarantee that your markup works.
<Loop type="post" custom_field="name" custom_field_value="John Smith"></Loop>
If a value includes double quotes, you can use ‘ single quotes ‘ around it.
<Loop type=post custom_field=name custom_field_value='Dwayne "The Rock" Johnson'></Loop>
Writing dynamic values of an attribute or parameter
In the first section of this guide, we looked at how some dynamic tags, such as the <Field /> tag, could be used to dynamically render some content from your WordPress site’s database, like a user’s name or a post’s title. But these dynamic tags aren’t only useful for displaying dynamic content on the front end of your site, they can also be used to dynamically define the value of an attribute or query parameter.
To do this, replace the angle brackets that would usually surround a dynamic tag (like <Field url /> in the example below) with curly braces. Since these attributes usually contain a space, be sure to wrap them in quotes. Closed tags like <Field /> don’t need the slash / to close themselves when they’re inside an attribute.
  <Loop type=post>
    <a href="{Field url}" alt="{Field title}">
      <Field title />
    </a>
  </Loop>
The markup above creates a loop of all posts, then uses the URL and title fields of each post to define the values of some standard attributes of the HTML <a> tag.
It’s also possible to write multiple dynamic tags within an attribute value. Just as demonstrated above, this is done by replacing all the angle brackets with curly braces, like this:
<Loop type=post custom_field=some_custom_field custom_field_value="{Format length=10}{Field other_custom_field}{/Format}">
Remember that you can also use these kinds of tags to define attribute values in dynamic tags as well. In the somewhat advanced example below, we create a loop inside another loop, using the outer loop to define some query parameters of the inner loop.
  <Loop type=taxonomy_term taxonomy=category>
    <strong><Field title /></strong>
    <br />
    <Loop type=post category="{Field name}">
      <Field title />
      <br />
    </Loop>
  </Loop>
What this markup is doing is creating a loop through all the blog post categories on our site and displaying the title of the category (its name) in bold. Then, under each category name, we’ve created a second loop that looks for posts that are in whatever category we’re currently looping through (using the dynamic value "{Field name}"), which then displays every post that matches the current category.
If you have a WordPress blog that uses categories, try installing Loops & Logic on your own site and pasting the markup above into a template to see its output!
Go forth and conquer
You should now have an understanding of all the terminology used when working with L&L markup and have all the right intuitions about writing valid and efficient markup. We’ve introduced a few common dynamic tags in this post like <Loop> and <Field />, but that’s only scratching the surface of all the things you can do with Loops & Logic. To dig a little deeper, you may want to familiarize yourself with a few of the common tags by reading through the documentation. After that, you should be all set to write your own templates or scour this site for ducks to see how we’ve built loopsandlogic.com using the L&L markup we’ve introduced above.
So go get building!