Whether you’re a seasoned WordPress developer or a newcomer looking to get more control over your site, Loops & Logic offers the ability to display and manipulate your site’s data more easily than ever. In this post, we’ll show you some practical examples to get you familiar with the process of writing L&L code.
This is a beginner’s guide, but we’ll assume you have a basic understanding of HTML syntax and are familiar with the concepts of tags and attributes. If not, that’s okay! For the better part of a decade, we’ve been recommending Don’t Fear the Internet as a quick way to get a conceptual understanding of HTML and CSS. The cultural references might be getting long in the tooth (remember lolcats?) but the knowledge is timeless. We’ll also assume you know basic WordPress concepts like post types and taxonomies.
Here’s the best part about following this guide; it won’t just improve your understanding of L&L templates, it’ll improve all your web development skills. We’ve designed the syntax based on established best practices in HTML and other popular programming languages. This means that while you don’t need to understand PHP or React to write your own templates, learning L&L will still help you start thinking like an advanced developer in how you solve problems and understand how your site works. Some of our own agency’s frontend developers have found that after becoming proficient in writing L&L code, they now have a solid foundation to start understanding PHP!
Understanding dynamic tags
The most basic superpower that L&L gives you is the ability to dynamically display content from your database—the massive spreadsheet-like tables that store all the data from your WordPress site. This is done using dynamic tags. Similar to HTML tags like <strong> and <ul> which give instructions to your browser about how to display content, dynamic tags in L&L extend the basic capabilities of HTML, often by giving instructions to the server about what content it should fetch, manipulate, or display. Any time you see a tag in L&L that’s capitalized, like <If> or <Get>, that’s a dynamic tag.
The most used dynamic tag in L&L is <Loop>. It’s so important that we named the whole plugin after it! Think of a loop as an instruction that tells WordPress to look through (or loop through) the items in your site’s database to find every piece of content that matches a certain set of criteria. A loop can be created from any content type on a WordPress site, such as posts, pages, custom post types, attachments, taxonomies, users, etc. This allows you to create a query for any post type (e.g. blog posts) and loop through each post to get or display its fields (e.g. the author).
Understanding the inner workings of Loops & Logic
Before we take a look at an example of L&L markup in action, let’s start by getting a conceptual understanding of the way in which L&L works and how it differs from plain HTML. Some of these concepts might be familiar to you if you’re experienced with WordPress or frontend development.
L&L markup gets rendered as HTML
As you probably know, HTML is a markup language that can be understood by web browsers. But HTML on its own is static, meaning that it can only display content that’s directly written in HTML on the page. If you had a blog that was completely created using static HTML, each time you added a new blog post, you’d also need to edit the page that lists all your blog posts (an archive page in WordPress-speak) to add a link to your new post.
This would be tedious to manage, which is why WordPress sites are dynamic; they’re able to generate HTML documents based on a set of instructions written in PHP. When you click to view our blog archive on this site, our servers don’t necessarily send you a pre-made HTML document. Instead, our servers receive instructions in PHP about how to piece together—or render—an HTML document that lists all the latest blog posts. That HTML document then gets delivered to you and displayed in your browser.
It’s important to keep in mind that while L&L markup looks similar to HTML, it works more similarly to dynamic languages in that it needs to be rendered before it can be displayed to your site’s visitors. There are two implications of this:
- L&L code needs to be processed just like any other dynamic language. This means that it’s important to keep your code lean and efficient to minimize its effect on page load times. We include tools (like the
<Timer>tag) to help you write efficient code. - L&L needs to be written inside of a template. Neither WordPress nor browsers natively understand how to display the dynamic tags in L&L markup, so it needs to be processed first inside of an L&L template.
A loop is a process, not a shortcut
As we noted above, the <Loop> tag is like an instruction that tells WordPress to look through the items in your site’s database to find every piece of content that matches a certain set of criteria. It’s important to keep in mind that in general, when you open a loop, you’re not just making data appear on the page. Instead, you’re actually telling your server to dig through all the content contained within a subset of your site’s database each time that page is loaded by a visitor on your site. Repeating loops throughout a page or creating complex nested loops can dramatically increase a page’s load time, so it’s important to consider your page’s performance by recognizing that the <Loop> tag is an instruction to process your site’s data, not a shortcut to the data itself.
What does this mean in practice? Let’s imagine you’re creating a user dashboard and you want to personalize it a bit by referring to your user throughout the page. You could use either of the following bits of markup to display the user’s name. Don’t worry if you don’t understand what this markup is actually doing yet, we’ll get to that later.
  <Loop type=user id=current>
    Hey there, <Field full_name />!
  </Loop>
Hey there, <User full_name />!
Since L&L makes it so simple to display dynamic data on your page (particularly with the simple <User> tag in this case), it could be tempting to sprinkle that markup anywhere on your dashboard where you want to refer to your user by name. But doing this would result in a new server process running in every spot where the user’s name is mentioned, which could impact the page’s load time. Instead of creating a new loop every time you want to display the user’s name, a better approach would be to use a single loop to save the user’s name to a variable and then refer to that saved variable throughout the page. Check out this article to learn more about the <Loop> tag.
Still a little abstract? Let’s look at an example.
Creating your first L&L template
L&L is powerful enough to build entire site themes, but we’ll start by looking at a basic template example to get familiar with the fundamentals. A template is the custom post type associated with Loops & Logic. Any L&L markup you write, including the code in the example below, will need to be added inside a template. Instead of sticking to default WordPress posts types, we’ll make things a little more interesting by using custom fields. While most custom field plugins suggest using either PHP (overly complicated) or shortcodes (not very powerful) to display your custom fields, L&L gives you the best of both worlds: the power of PHP with far less complexity. Let’s see it in action!
Step 1: make some test data
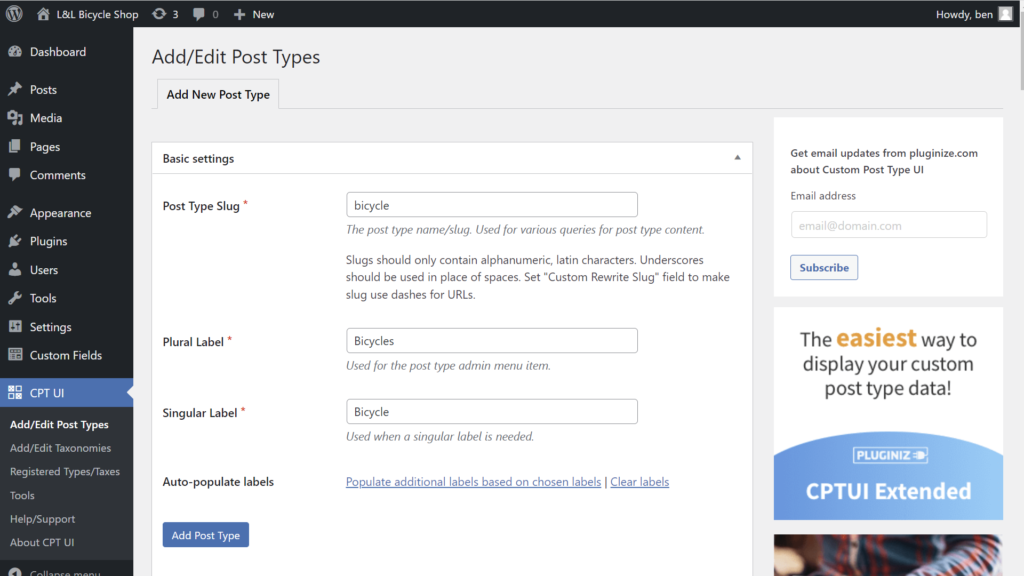
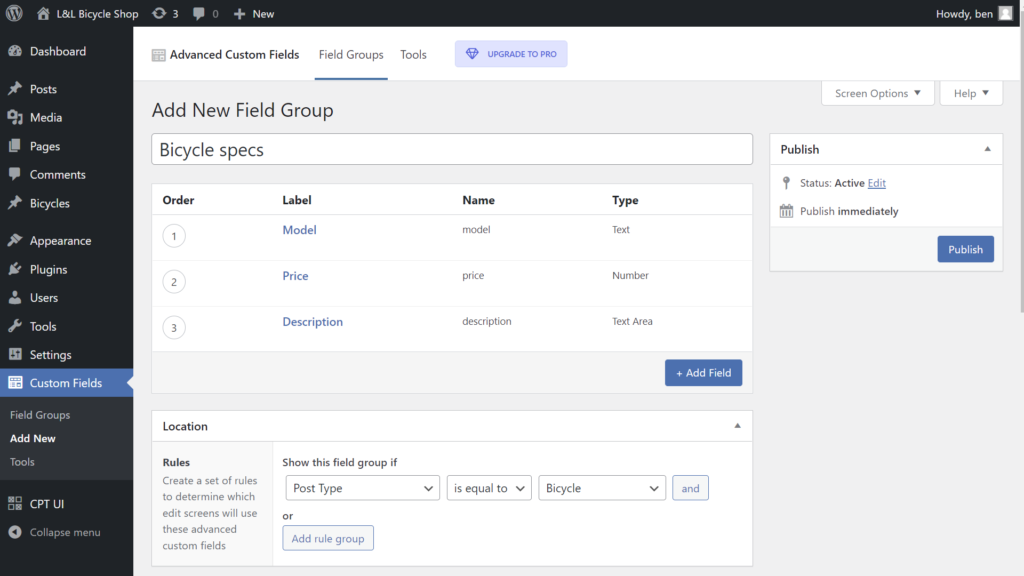
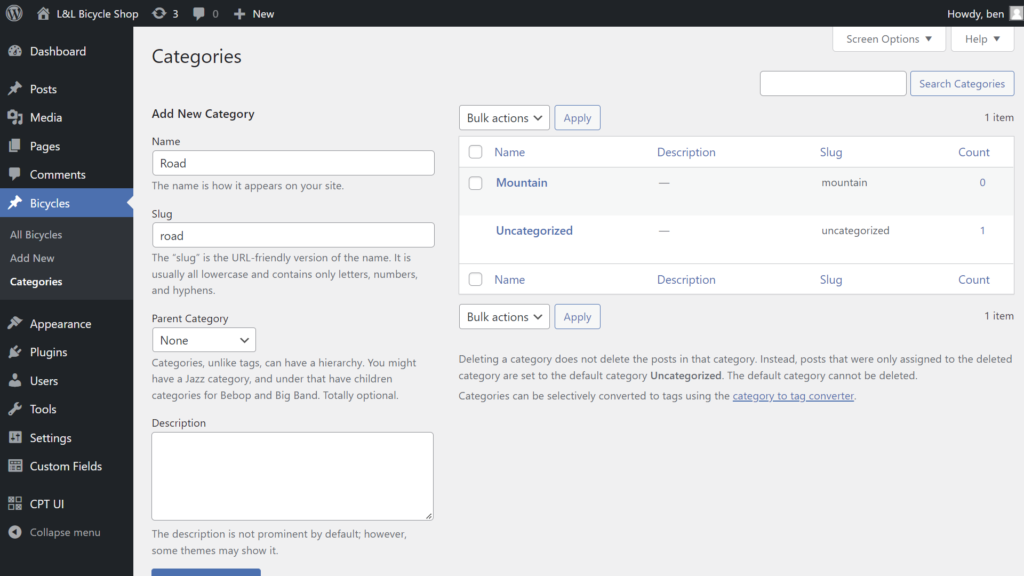
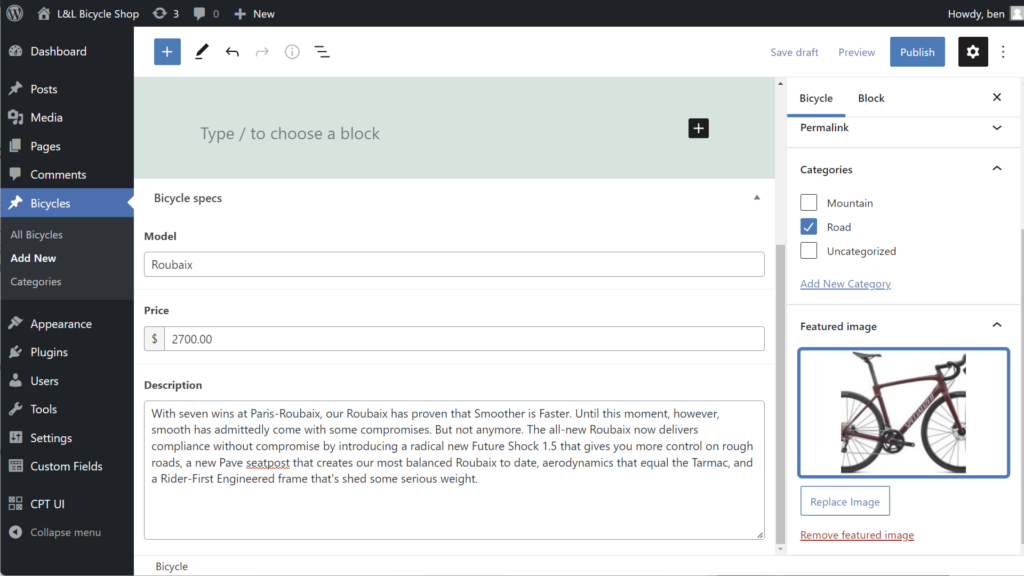
If you’d like to follow along with this L&L example on your own site, feel free to add some data to a WordPress site that you can work with. You can use plugins like Custom Post Type UI and Advanced Custom Fields to create your own post types, taxonomies, and fields.
Imagine a bicycle shop that wants to display its latest models.
- Create a custom post type called
bicycle. - Add fields such as
model,price, anddescription. - Add categories such as
mountainorroad. - Add a few bicycles as new posts.
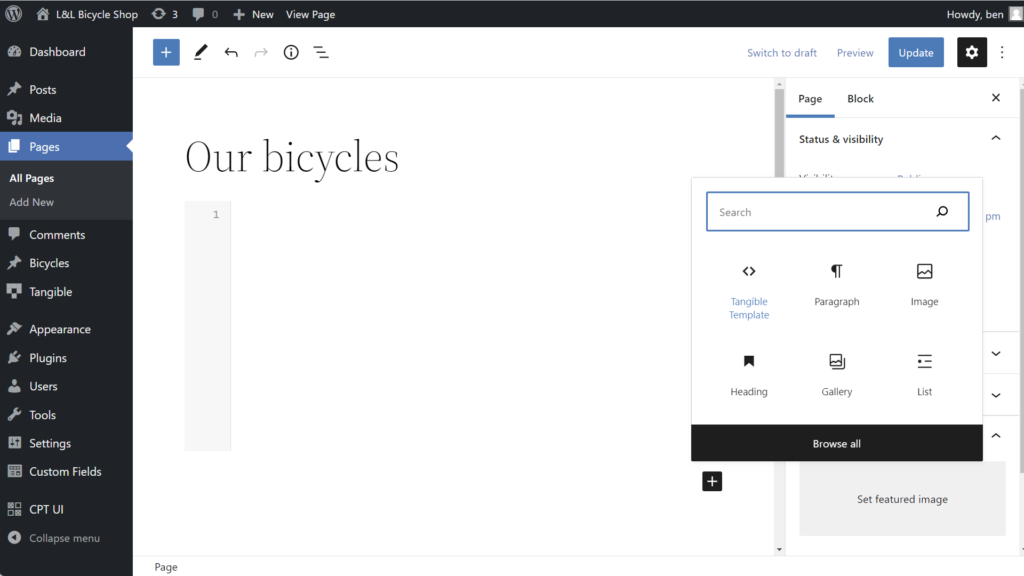
- Create a new page to display the bicycles and add the Tangible Template block.
Step 2: create your L&L template
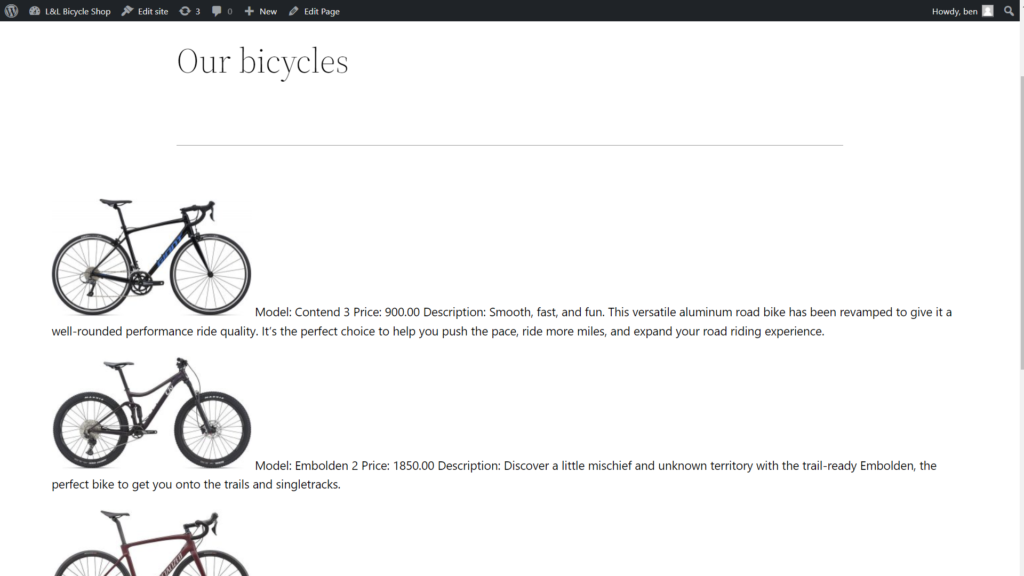
Now for the fun part: displaying your content! Our bicycle shop wants to display all its models on a page. Below is a basic template written in L&L that loops through all the posts of type bicycle and for each post, displays fields such as the featured image, model name, price, and description. The image on the right shows the output using the test data we added earlier.
  <Loop type=bicycle>
    <Field image size=medium />
    Model: <Field model />
    Price: <Field price />
    Description: <Field description />
    <br />
  </Loop>
That’s all there is to it! We haven’t added any styling to our template, but already with just a few lines L&L, we’ve output our custom fields in line with some text and familiar HTML tags like <br />. But what is that template actually doing? Let’s take a look at it line by line to better understand its components.
Step 3: figure out what you’ve just written
<Loop type=bicycle>
The code starts with a <Loop> tag. As discussed above, this is a dynamic tag that instructs the server to start querying the WordPress database for a particular type of content. The type attribute defines the type of content that should be looped through, often a post type. In our case, we want to loop through the bicycle post type we created earlier, so we use bicycle as the value of our attribute.
<Field image size=medium />
We’re now inside of our loop. The loop will run once for each post that matches the attributes we specified above. So if there are six posts of type bicycle, our loop will run six times, displaying the fields specified within the loop for all six of our posts. On this line, we’re using the <Field /> tag to display the image field (the featured image) of the post that’s currently being looped through. We’ve also added a size attribute to specify what size of image we want to display. Just like in HTML, self-closing tags end with />.
  Model: <Field model />
  Price: <Field price />
  Description: <Field description />
More fields! You can see that we’ve added some plain text such as Model: and Price: alongside our <Field /> tags. In the line above, we used the standard image field, but we can also reference the custom fields we’ve made. Just like in standard HTML, the text will be displayed as-is on the front end of the site, whereas the dynamic tags will be replaced by the data they’re fetching.
<br>
The good ol’ break tag! You can use all the standard HTML tags you’re familiar with in the L&L template editor.
</Loop>
Everything that has a beginning must come to an end. This line closes the loop tag.
Starting to get the hang of things? Take a look at the L&L template below and try to picture what its output would be. Don’t worry if you’re not familiar with all the syntax yet, this is just an opportunity to test your intuitions. Copy it into a template block on the page we created above and see if you were right!
  <ul>
    <Loop type=bicycle category=mountain>
      <li><a href="{Field url}"><Field title /></a> - <Field model /> - <Field price /></li>
    </Loop>
  </ul>
If you guessed that this would display an unordered list of all the mountain bikes (bicycle posts that are in the mountain category) with titles that link to the individual posts, you’d be right! You may have noticed that we introduced a bit of new syntax above with the curly braces in href="{Field url}". We jumped a few steps ahead with that example by showing you a tag within an attribute, which is a concept that we dive into in our introduction to L&L terminology and syntax.
Even if you’re not comfortable writing your own templates yet, we hope you can see how L&L markup can interact with standard HTML markup and how dynamic content from your site can be displayed.
Loading your own L&L templates
Now that you’ve seen the loop tag in action, you might want to start tinkering with L&L templates on your own and learning about all the other dynamic tags available to you in the template editor. Experimentation is our favorite way to learn, but there’s one more thing to understand first: how to load an L&L template onto a page.
L&L markup won’t be parsed in the normal WordPress content area, which means that it needs to be loaded onto a page within a template. There are two main ways to load a template:
- Use the Tangible Template block inline.
- Create a saved template with your markup and load it with the
[template]shortcode or the Tangible Template block.
In the bike shop example above, we added our L&L directly to an inline Tangible Template block in Gutenberg. The same thing can be done using the widget in Elementor or the module in Beaver Builder. This method is a convenient way to add a small piece of one-off L&L code but isn’t a great way to build reusable, shareable, styled L&L templates. In most cases, we recommend writing your L&L into a saved template. This allows you to add styling and scripts to your template and make use of L&L’s built-in SASS editor.
Getting your hands dirty
We’re firm believers in learning by doing. We hope this post has helped you understand the rough structure of L&L code and has given you the confidence to start tinkering with loops on your own site to reference your post data and custom fields. If you’d like to dig a little deeper into the terminology and syntax of L&L, check out this getting started guide.
One of the great things about L&L is that, unlike PHP, it’s impossible to cause a fatal error on your site by writing incorrect code. So go ahead and make mistakes, it’s the best way to learn!